The Loom Project - part 1
During Spring 2020 we were plunged into Covid Lockdown - the unexpected and desperate measures that halted our normal lives, and started so many of us on new projects indoors.
I was staying at my parents remote cottage in rural Scotland with my father, while my mother was seriously ill in hospital following a series of strokes. First the daily visits to the hospital were stopped; then came the announcement that the elderly like my father were not permitted to leave the house at all for three months. I could venture out once a week just to buy whatever groceries were available in the tiny "local" shop 10 miles away. Not even another cottage in sight, so Dad and I were about as safe as could be, and in a beautiful wild part of the country, but we needed something to fill the hours.
In the barn was a loom, which had been "resting" there for some time. I knew it had been working in it's previous home, I believed all the bits were there, all that had been lacking was time to put it back together. Resurrection of this loom became our project, almost an obsession, to keep ourselves going through the long dreadful weeks of isolation.
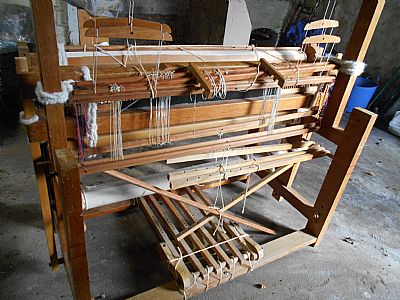
The Before picture - the loom in a very sorry state in the barn.
We both thought we knew how to weave, but that was plain "one up one down" on a tiny table loom. This thing was complicated, and we didn't even know what some bits were called, or what they should do if they worked! Step 1 involved pencil and paper for notes, and a camera to help us put things back where they had been before, and then taking it apart for some serious cleaning.
Step 2 involved many hours of research on the internet at very slow connection speeds. Dad found a collection of very old weaving books that had been scanned as pdf's and put onto a cd. This disc helped us piece together the history behind the technology, how and why looms had changed over the last 200 years, and where in that sequence this particular loom had been designed. Now we had a better idea of how to put the bits in the correct places.
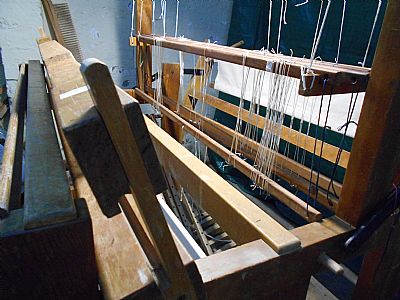
Most of the bits are in the right place. What are we still missing?
We discovered that the "reed" was quite a fine one, and dirty and rusty from long disuse. There were also very few of the string-type "heddles". Although physical shops were closed, online shops were still posting orders. At that time the theory was that the virus only lived a week on hard surfaces, so leave your parcel unopened for two weeks and it should be safe. We spent the time learning about how to read a pattern, and how to thread the loom to create the design shown in the pattern.
Eventually we replaced the reed, and added many new heddles onto each "shaft". A pattern had been chosen and drawn out onto squared paper. We calculated the number of warp threads required, and at what length. The time had come to put it together, the daunting task of threading each end of warp through the correct heddle on the correct shaft, so that the desired pattern can be woven. It took hours!
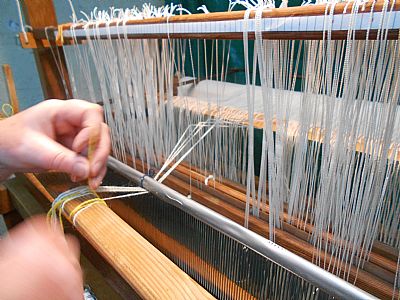
Threading the Heddles
This is only the obvious part of the pattern set-up however. In order to raise the correct shaft(s) in sequence there are foot-pedals below. There is a wonderfully flexible system of bars with holes and bits of string that allow you to connect pedals to shafts in any combination you can imagine. Thank goodness for green gardening string and the easy to adjust "weavers knot".
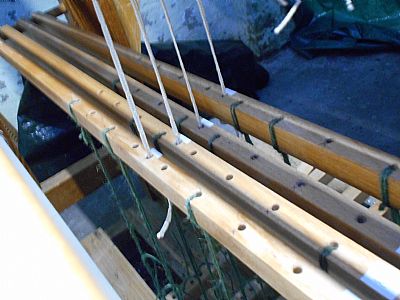
How to attach any shaft to any pedal
At the start we had lifted the whole loom off the cold damp floor and onto a couple of pallets. This had also allowed us to see underneath and to access the pedals. Green gardening string wasn't ideal of course, and has since been replaced with a nylon equivalent that doesn't vary with humidity quite so much. But the ingenuity of such a flexible design was impressive.
At long last it was all set up and ready to start weaving. It looked good, but did it work?
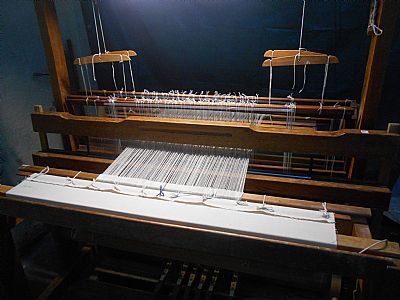
The After picture - all set up and ready to start weaving.
There had been many hours of work getting to this stage, so there was no way I was going to settle for a one-up-one-down "tabby" weave, or even a plaid. This four-shaft loom was designed to make patterns, so when I was doing the planning and threading the heddles, that was what I set up to weave.
There's nothing like jumping in the deep end! But the hours of persistence paid off. I am very proud of the successful outcome - my first real weave on my first full-sized loom.
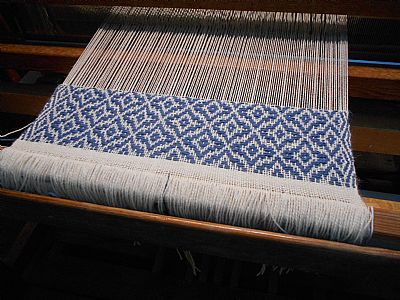
The first weave
